In our latest guide, we’ll be introducing you to the Talent Pool, which is a brand-new feature for our recruiters; we’ll also demonstrate how using this can save you time and effort within your recruitment process.
Saving candidates to your Talent Pool
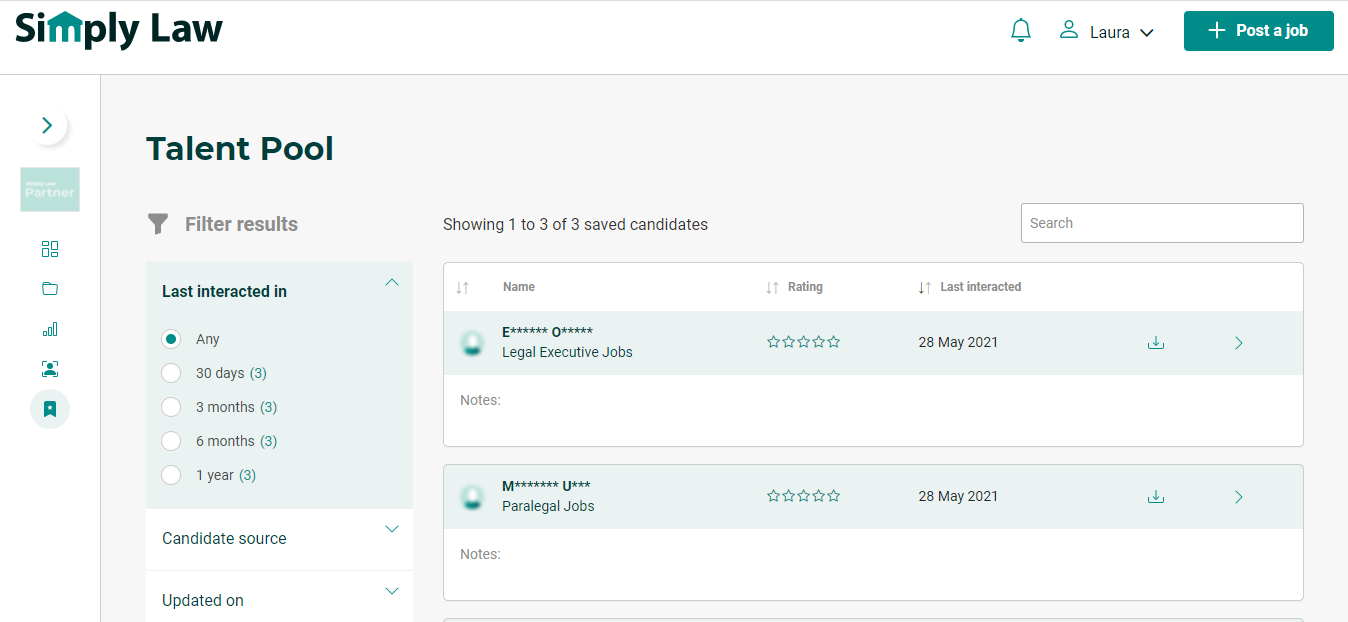
The Talent Pool is a space where you can save candidates who you’d like to keep on record, for example if you feel someone may be suitable for a future opportunity you’re likely to be hiring for.
You can either save a candidate to your Talent Pool directly from within CV Discovery whilst you browse, or from within your job applicants’ area if you’d like to save a candidate who has applied to one of your roles.

To save a candidate to your Talent Pool, simply click the Save Candidate button to the top right whilst viewing their candidate profile. Once you’ve saved a candidate, you’ll find them in the Talent Pool area which you can access at any time via the main left-hand menu.
Building up a Talent Pool is a great way to save yourself time and effort further down the line; we recommend keeping in mind the roles that you often tend to recruit for whilst you browse CV Discovery.
That way, if you come across a candidate who appears ideal for one of these roles, you can save them in seconds; and you’ll eventually have a ready-made list of professionals ready for you to reach out to when you’re hiring, saving you precious time.
Adding notes against candidates
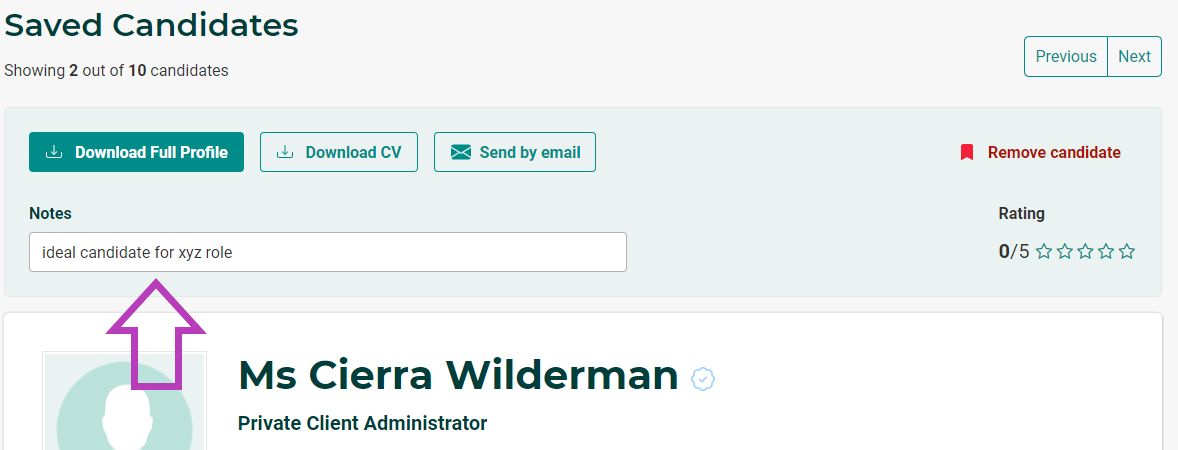
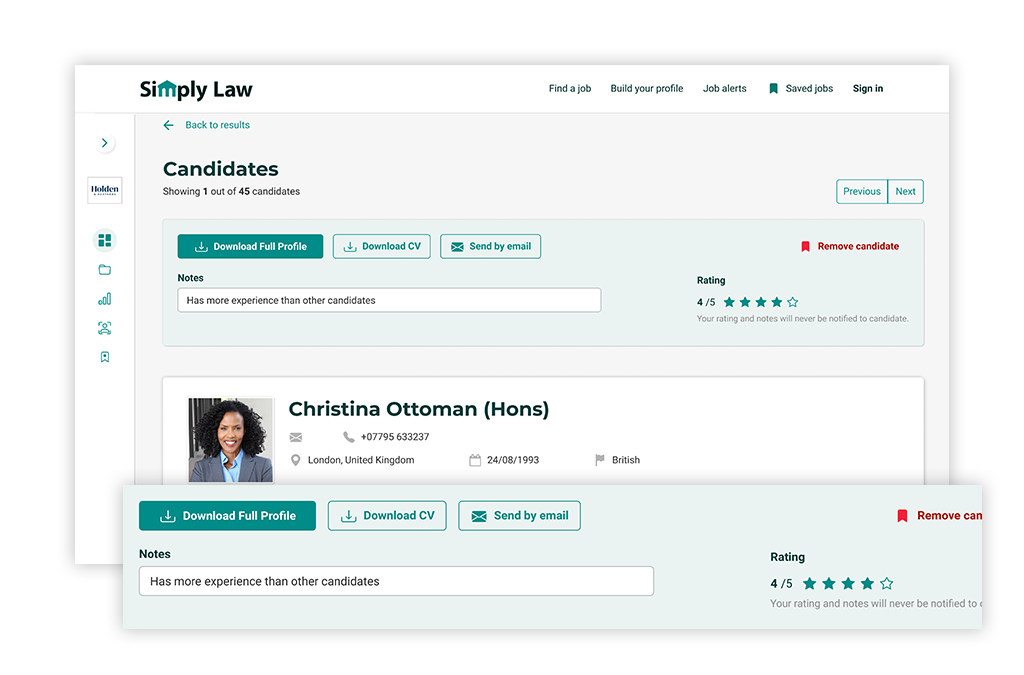
Once you’ve saved a candidate to your Talent Pool, a new section will appear above their profile giving you the opportunity to add notes and a rating against them, allowing you to give some context for future reference as to why you’ve saved the candidate. This information is only visible to yourself and any other colleagues who share your account; it is not visible to the candidate.

You’ll also be able to add, edit or remove notes later on from within the Talent Pool area itself. Simply click on the candidate’s name to open up their profile and make the necessary changes to your notes and/or rating; this will automatically save, so all you need to do is come out of the candidate’s profile and the changes will be visible to you.
If you’ve saved a candidate who has applied to one of your jobs, you’ll also see which job they originally applied for underneath any notes that you’ve added against them.

One way to approach adding notes is to add specific reminders as to why you’ve saved a candidate, for example if there was something that stood out positively during an interview; anything that can help jog your memory of that person.
Alongside this, we also recommend including some kind of marker in your notes that fits into a standardised format, for example tagging candidates with a job reference or another term that your team uses internally.
This can prove helpful when it comes to searching amongst your saved candidates in future, particularly if you share your account with colleagues.
For example, if you have seen an ideal candidate for a role that your colleague is hiring for, you can save this candidate with a note including your colleague’s name or some terminology that is familiar to your team. Your colleague can then search by your chosen word/phrase to find the candidate in your Talent Pool, potentially saving them valuable searching time.
Searching and filtering amongst your saved candidates
Once you’ve built up a good sized pool of candidates, you’ll need a way of easily searching amongst them to find those who meet specific criteria in future, rather than having to browse through a long list of names. There are two ways you can do this.
The search bar at the top of your Talent Pool allows you to search for candidates by their first name, their job title, a keyword from your notes, or the title of the job which they originally applied to (if applicable). Simply start typing and the results will narrow down to match your search terms.
Another way to browse amongst your saved candidates is by using the handy filters on the left-hand side. We know there are several factors that can influence whether someone is suitable for a role, often coming down to very specific requirements. This is why we’ve provided 14 filters which you can use in any desired combination, to find professionals who meet ultra-specific criteria.
Some of the filters available to you include:
- Whether you saved a candidate from CV Discovery or from your job applicants
- How recently you last interacted with their profile, e.g. added a note
- How many years’ PQE the candidate has
- Their desired contract type
- Their home location, desired location and their willingness to relocate
- Their level of profile completion
And many more.
This allows you to save as many candidates as you like, safe in the knowledge that you’ll always be able to filter these down to a selection which meets your criteria when it comes to hiring for future roles.
5 ways your job posting experience just got easier
In this guide we’ll take a closer look at some of the recent updates to Simply Law which have been designed to make your life easier when posting new vacancies; many of these have been implemented thanks to direct feedback from our recruiters. It’s our goal to make...
Discover the factors affecting your jobs’ performance with the Reporting area
In this guide we’ll be taking a closer look at the job performance table, which you can find at the very bottom of your Reporting area.This table gives you the most in-depth insights out of all the reports on your account, providing you with a super-detailed look at...
Tracking your jobs’ performance: how to turn insights into actions
In this guide we’ll be taking a closer look at the Reporting section of your recruiter account. We’ve designed the reports in this area to help you gain a better understanding of your jobs’ performance, providing you with insights that can help you take proactive...


